Getting started with Aspectum
Sign Up
Go to Aspectum app page , click Sign up and fill in all the required entry fields on the right hand-side of the screen. Note, you can also log in with G+, LinkedIn or Facebook.
For this purpose go to EOS, hover over PRODUCTS to expand drop-down sub-menu and click Aspectum. At the Aspectum page press Sign up. Click Sign up and fill in all the required entry fields on the right hand-side of the screen.
Add your vector data
From your Dataset dashboard click Upload Datasets on the far right of the screen and import your dataset, clicking Select file box. You can use any of the supported geospatial data formats (.csv, .xls, .xlsx, .zip, .geojson, kml, .kmz, .xml, . osm, .gpx) as well as bulk loading function.
You can also upload dataset using Drag’n’Drop, dragging files to the Datasets page.
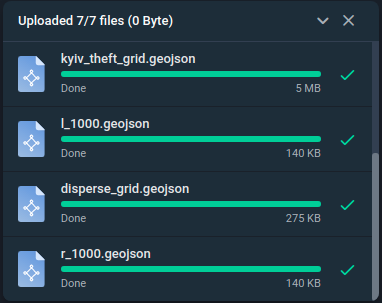
Wait for the dataset to be uploaded and processed. The processing time depends on the dataset size. Normally, it takes just few seconds and you can watch the status on the progress bar in the bottom of the left hand-side of the screen. The green mark notifies that data is imported successfully and your dataset is already in.
If you upload a dataset with a name that is already in your dataset list, an additional window will appear to overwrite the existing dataset or load as a copy.
Add WMS
How to add WMS layer to the Aspectum Smart Map? Aspectum supports visualization of satellite and drone imagery as WMS layers.
Aspectum Partnership Network provides EOS Storage – specially developed to store and get the instant access to thousands and thousands of Terabytes of Earth Observation and GIS related data. You can convert your geotiff files to WMS URL and import them to Aspectum.
- Go to your EOS Storage Account
- Go to My Storage Tab. Upload the necessary geotiff file. It may take some time to upload it.
- Go to My Maps in Aspectum and create a new map, where you suppose to use WMS.
- Wait until an image is uploaded, which is indicated by a green status bar and a preview icon.
- Click on the image settings and choose Access. Choose WMS. Copy the formed link.
- Go to your new map in Aspectum and click Add layer. Choose WMS tab. Paste the copied link. Click Add layer.
- After a while, your WMS layer will appear. Use layer properties to choose an appropriate image.
Watch Video Tutorial – How to import geotiff and create WMS URL to import into Aspectum
Geocoding
Geocoding feature is designed to convert the attributive data into Lat Long coordinates. In case you upload the datasets in CSV, XLS, XLSX formats it’s employed to get geometry data from address. The more detailed location data the datasets contain (number/building, street/road, city /town/village, neighbourhood/community/locality, county/municipality/district, state/region/province, country, postal code), the better output results the service produces.
In Aspectum, currently, the user’s data is parsed and geocoded by default.
You can lookup the geocoding results displayed in form of points on your Map or/and in the respective Latitude and Longitude fields.
To check lat&long coordinates, upload your dataset, add it to the map, click the target point on your Map and use the Edit option in the pop-up information box to see the outcome results in the Geometry tab